Understanding Floor Tiles Replacement
What Is Floor Tiles Replacement?
In the realm of home improvement, few projects evoke as much transformation as **floor tiles replacement**. It’s not merely about swapping out old, worn tiles; it’s about reimagining the entire space beneath your feet. Imagine the impact of new, pristine tiles on your living environment—suddenly, your room feels refreshed, modernised, almost reborn.
Understanding what **floor tiles replacement** entails is crucial. It involves carefully removing existing tiles, assessing the underlying surface, and installing new materials that suit your aesthetic and functional needs. The process can be intricate, often revealing hidden issues like subfloor damage or moisture problems that must be addressed before new tiles are laid.
For those considering a DIY approach or hiring professionals, knowing the key steps can demystify the process:
- Removing old tiles carefully to prevent damage
- Preparing the subfloor for a smooth, even surface
- Selecting the right type of tiles based on location and wear
- Applying adhesive and setting the new tiles with precision
Every step in **floor tiles replacement** demands attention to detail—an effort that, when executed well, results in a stunning, enduring finish. It’s a journey of transformation, where each tile laid is a step towards a better, more beautiful space.
Reasons to Replace Floor Tiles
There’s an undeniable allure in the subtle yet profound impact of a well-executed floor tiles replacement. Sometimes, the reasons for this transformation aren’t purely aesthetic; they stem from practical concerns that can shape daily life. Worn-out tiles can compromise safety, especially when cracks or uneven surfaces emerge—posing a risk of slips and falls. Likewise, water damage or persistent stains often signal that it’s time for a change, as these issues threaten the integrity of the subfloor beneath.
In addition to safety and damage, the evolving tastes and lifestyles of homeowners play a significant role in the decision to opt for floor tiles replacement. Outdated patterns or materials may no longer align with modern interiors, making a fresh, contemporary look both desirable and necessary. For some, it’s about increasing property value, as a pristine, updated floor can be a compelling selling point. Ultimately, understanding the reasons behind floor tiles replacement helps in making informed choices that blend durability with design excellence.
Signs You Need a Tile Replacement
When the once-pristine surface begins to betray signs of neglect, it’s a silent siren calling for floor tiles replacement. Cracks that spiderweb across the surface may seem insignificant at first, but they weaken the very foundation of your space—jeopardising safety and aesthetic harmony. Uneven tiles can turn a graceful stride into a stumble, reminding us that practicality often demands immediate attention.
Persistent stains, water damage, or discolouration are not merely blemishes but are symptoms of deeper issues lurking beneath the surface. These visual cues serve as an urgent reminder that it might be time to consider a thorough overhaul—an opportunity to rejuvenate your environment with fresh, durable tiles that stand the test of time.
To aid in recognising the subtle yet telling signs of needing floor tiles replacement, look out for:
- Loose or hollow-sounding tiles when walked upon
- Visible cracks or chips that worsen over time
- Water stains or mould growth around tiles
- Discolouration that no cleaning can remedy
Heeding these signs early ensures that your space remains both safe and visually captivating, preventing minor issues from blossoming into costly emergencies. The decision for floor tiles replacement is often a marriage of instinct and insight—an elegant solution to preserve the beauty and integrity of your home.
Preparing for Floor Tiles Replacement
Assessing Your Current Flooring
Every home has a story, and often the wear and tear on your flooring tells a chapter of daily life—scratches, discolouration, and uneven surfaces whisper tales of years gone by. Before diving into floor tiles replacement, it’s essential to assess your current flooring carefully. This process isn’t just about spotting cracks or chips; it’s about understanding the underlying condition of your tiles and the subfloor beneath. Sometimes, what appears to be a simple aesthetic issue may hide deeper structural concerns.
To get a clear picture, take a moment to evaluate the extent of damage and decide whether the existing subfloor is sound enough to support new tiles. Here’s a quick checklist to guide your assessment:
- Check for loose or hollow-sounding tiles that may indicate subfloor instability
- Inspect grout lines for excessive cracks or mould growth
- Look for uneven areas or tiles that are sinking or wobbling
- Identify any water damage or staining that could compromise the integrity of the floor
Understanding these aspects helps ensure your decision for floor tiles replacement is well-informed, paving the way for a seamless upgrade that rejuvenates your space and preserves the comfort you cherish. Assessing your current flooring with care transforms a routine task into an act of loving craftsmanship—one that honours your home’s history while preparing it for a beautiful new chapter.
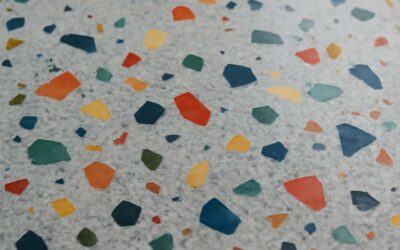
Choosing the Right Replacement Tiles – Array
Preparing for floor tiles replacement is akin to composing a symphony—every element must harmonise to achieve a stunning finale. The choice of replacement tiles demands more than aesthetic appeal; it requires a thoughtful understanding of your space’s unique rhythm. When selecting new tiles, consider factors such as durability, slip resistance, and colour palette—these are the notes that will define the mood and functionality of your room for years to come.
To guide your decision, I often recommend crafting a small mood board or collecting samples. This tactile approach helps visualise how different textures and shades will interact with your existing décor. For a seamless transition, many opt for classic porcelain or resilient ceramic tiles, renowned for their longevity and timeless elegance.
Remember, the perfect tile isn’t just about beauty—its suitability for the environment and ease of maintenance are equally crucial in the journey of floor tiles replacement.
Budget Planning for Tile Replacement
Embarking on a floor tiles replacement project without a clear budget is like navigating a maze blindfolded—uncertainty lurks around every corner. Allocating funds wisely ensures your transformation remains both stunning and sustainable. The key is to anticipate all costs involved, from materials to labour, and leave room for unexpected expenses that can often surface during the installation process.
To get started, I recommend creating a detailed budget plan that includes the core elements of floor tiles replacement. This can be broken down into three main categories:
- Material costs – including the tiles, adhesives, and grouts
- Labour expenses – hiring professional tilers or contractors
- Additional costs – such as surface preparation, removal of old tiles, and finishing touches
Establishing a clear financial framework not only helps prevent surprises but also empowers you to choose high-quality tiles that fit your aesthetic and functional needs without compromise. Remember, investing in durable, well-crafted tiles may seem costly upfront, but it pays dividends through longevity and reduced maintenance—making your floor tiles replacement worthwhile in the long run.
Gathering Necessary Tools and Materials
Preparing for floor tiles replacement isn’t just about selecting the perfect design; it’s about assembling the right arsenal of tools and materials to turn your vision into reality. Without the correct equipment, even the most meticulous plans can falter—turning a straightforward project into a costly gamble. As the saying goes, “A craftsman is only as good as their tools,” and this holds especially true for floor tiles replacement.
Before diving into the installation process, ensure you have essential items at hand. These include a tile cutter or wet saw, notched trowels, spacers, and safety gear like gloves and goggles. Additionally, gathering quality materials such as the right adhesive, grout, and sealant is crucial. To streamline your effort, consider creating a checklist. Here’s a quick overview:
- Measuring tape and chalk line for accurate layout
- Tile adhesive and grout suited for your chosen tiles
- Surface preparation tools like scrapers, grinders, or sanders
- Level and straightedge to ensure even placement
Being prepared with all necessary tools and materials not only simplifies the process but also safeguards the durability of your floor tiles replacement project. Every detail counts when transforming your space into something truly exceptional—so don’t overlook the importance of a well-stocked toolkit.
Step-by-Step Floor Tiles Replacement Process
Removing Old Tiles
Embarking on a voyage of floor tiles replacement is akin to awakening a dormant realm beneath your feet, waiting to reveal its hidden splendour. The first step in this enchanted journey involves carefully removing the old, weathered tiles—an act of unearthing history and making space for renewal. This process, though seemingly straightforward, demands patience and precision, as each tile’s departure whispers tales of bygone days.
To ensure a seamless transition, gather your tools—hammer, chisel, and safety gear—before delving into the task. Start by scoring the grout lines with a utility knife, softening the bond between the tiles and the substrate. Then, gently tap the chisel beneath each tile, levering it loose without damaging the underlying surface. For larger areas, an electric grout removal tool can expedite the process, transforming a tedious chore into a satisfying ritual.
For efficiency and safety, it’s beneficial to follow a systematic approach:
- Clear the space and protect surrounding areas.
- Score the grout lines to weaken the adhesive bond.
- Use a chisel and mallet to lift each tile carefully.
- Remove residual adhesive, preparing the surface for the new tiles.
As you peel away the layers of the old, the bare substrate emerges—ready to be transformed by fresh, vibrant tiles. This step is vital in the floor tiles replacement process, laying a foundation for the beauty and durability to come. Every piece of removed tile contributes to the mosaic of a renewed space, where craftsmanship and vision meld into a new chapter of interior elegance.
Preparing the Subfloor
Preparing the subfloor is a pivotal step in the process of floor tiles replacement, often overlooked by those eager to see the final result. A stable, even surface ensures that your new tiles will lay flat, resist cracking, and stand the test of time. This stage demands patience and an eye for detail, as it’s where the foundation for beauty and durability is laid. Any imperfections here could compromise the entire project, turning what should be a seamless transformation into a costly repair.
Begin by thoroughly cleaning the exposed substrate, removing any dust, debris, or residual adhesive. Next, inspect the surface for uneven patches or cracks—these must be addressed before laying new tiles. For minor imperfections, a simple smoothing compound will suffice; larger issues might require more extensive repairs or even replacing sections of the substrate. Once the surface is level and clean, it’s crucial to lay a waterproof membrane or primer, especially in areas prone to moisture, to protect your investment in the long run.
To facilitate a smooth installation, some professionals recommend creating a grid or reference lines on the subfloor, ensuring precise alignment of the new tiles. This careful preparation acts as the backbone of a successful floor tiles replacement, transforming a rough, uneven base into a pristine canvas for your chosen tiles. When the subfloor is properly prepared, the artistry of laying the tiles can truly shine, culminating in a finish that’s both beautiful and enduring.
Laying New Tiles
Transforming a space with new floor tiles is an art that demands patience and precision. Once the subfloor is impeccably prepared, the meticulous process of laying new tiles begins, revealing the true beauty of your renovation. This stage is where craftsmanship meets design, turning an ordinary surface into a stunning focal point. Proper alignment and careful placement are essential to ensure the final result is both aesthetically pleasing and durable.
To achieve flawless results, many professionals utilise reference lines or grid patterns, creating a guide that keeps each tile aligned perfectly. This technique not only streamlines the installation but also prevents uneven joints that could mar the visual harmony. When laying new tiles for your floor tiles replacement, attention to detail during this phase guarantees a seamless finish that withstands the test of time.
Throughout this process, maintaining a steady pace and checking the layout frequently can make all the difference. Remember, the key to a successful floor tiles replacement lies in the craftsmanship of laying each piece with care. The interplay of light, shadow, and texture will ultimately breathe new life into your space, showcasing your vision in its full splendour.
Grouting and Finishing
Once the new tiles are meticulously laid, the transformation enters its most delicate and defining phase: grouting and finishing. This stage breathes life into the mosaic, sealing the gaps and creating a seamless surface that embodies both durability and aesthetic allure. Grouting is not merely about filling voids; it is an art form that requires patience and precision, ensuring each joint is uniform and free of excess. Proper grouting enhances the structural integrity of your floor tiles replacement, preventing moisture ingress and long-term damage.
As the grout sets, it’s essential to carefully wipe away any surplus, revealing the true splendour of the newly installed tiles. For a polished appearance, many professionals employ a specialised sponge or cloth, gently working to smooth the grout lines and eliminate any haze. Once dried, a sealing agent can be applied to safeguard your investment, safeguarding against stains and wear. The final flourish in the floor tiles replacement process transforms an ordinary surface into a captivating masterpiece—an enduring testament to craftsmanship.
During this phase, attention to detail is paramount. A systematic approach—such as
- checking grout consistency
- ensuring even application
—can dramatically elevate the final outcome. This careful finishing process guarantees your floor tiles replacement will not only look impeccable but also withstand the rigours of daily life, standing the test of time with a resilient, flawless surface.
Cleanup and Inspection
Once the final tile has been laid and the grout has set, the process of cleanup and inspection becomes critical in ensuring your floor tiles replacement looks pristine and professional. This stage is often overlooked, yet it plays a vital role in the durability and visual appeal of your newly renovated floor.
Begin by carefully removing any residual grout haze with a damp cloth or specialised cleaning pad. This step reveals the true beauty of your tiles, highlighting their colour and texture. As you work, keep a keen eye on the grout lines, checking for uniformity and any missed spots that may need touch-up. This meticulous attention to detail guarantees that every inch of your floor reflects craftsmanship and care.
To ensure the integrity of your floor tiles replacement, a thorough inspection should follow. Look for cracked or loose tiles, uneven grout lines, or areas where the sealant might be lacking. Addressing these issues early prevents long-term damage and preserves your investment. Remember, a clean, well-inspected surface not only looks stunning but also stands resilient against daily wear and tear.
Professional vs. DIY Tile Replacement
Advantages of Hiring Professionals
Choosing between professional and DIY floor tiles replacement can be a game-changer for your home’s aesthetic and longevity. While DIY may seem tempting, it’s often a gamble with unpredictable outcomes. Hiring seasoned experts guarantees precision, durability, and a seamless finish that DIY enthusiasts rarely achieve on their first attempt. Professionals bring a wealth of experience, ensuring every tile is perfectly aligned and securely adhered, reducing the risk of future damage or costly repairs.
Moreover, professionals possess specialised tools that streamline the process, saving you time and frustration. Their expertise also includes handling unexpected issues—like subfloor irregularities—that can derail a DIY project. For those considering professional help, here are some undeniable advantages:
- Quality craftsmanship that stands the test of time
- Enhanced safety during the removal and installation process
- Access to premium materials and techniques not available to the general public
Investing in expert floor tiles replacement isn’t just about aesthetics; it’s about ensuring your space remains resilient and beautiful for years to come. The supernatural precision of professional installers transforms your flooring from mere tiles into a masterpiece that elevates your entire home’s character.
DIY Floor Tile Replacement Tips
In the shadowy realm of home renovation, the debate between professional and DIY floor tiles replacement remains as old as the stones themselves. While a DIY approach may tempt those daring enough to wield a trowel, the risks often overshadow the rewards. Professionals, with their mastery of craft, transform a mundane task into an art form—ensuring each tile is laid with gothic precision, and the result endures through the ages.
For the uninitiated, some pitfalls may lurk behind the promise of savings. Unforeseen subfloor irregularities or misaligned tiles can turn a simple project into a costly nightmare. A carefully curated list of steps—like meticulous subfloor preparation and precise grouting—becomes a daunting puzzle without the right tools or experience. When considering DIY, remember that the devil is in the details. If you choose to proceed alone, focus on these key tips:
- Thoroughly assess the subfloor for any weaknesses or irregularities.
- Use high-quality adhesive and premium tiles to ensure longevity.
- Take your time to align each tile perfectly, avoiding future cracks or uneven surfaces.
Yet, amidst the allure of independence, the allure of professional floor tiles replacement beckons with its promise of resilience and timeless beauty. When expertly executed, the transformation is more than superficial; it’s an elevation of your entire space—an enduring testament to craftsmanship that withstands the relentless march of time.
Common Challenges and How to Overcome Them
Professional versus DIY floor tiles replacement presents a compelling dilemma, especially when considering the common challenges each approach entails. While DIY enthusiasts may relish the prospect of saving money and exercising creative control, they often encounter pitfalls that can compromise the project’s integrity. In contrast, professionals bring an experienced eye and refined techniques that mitigate these risks, yet their services come with a premium. One of the primary hurdles in DIY floor tiles replacement is achieving perfect alignment—an intricate task that requires patience and precision. Misaligned tiles or uneven grout lines can mar the visual harmony of your space, often necessitating costly corrections down the line.
To navigate these hurdles, some homeowners employ a simple yet effective strategy:
- meticulous planning
- investing in high-quality materials
- taking the time to ensure each tile is laid with care
. However, the real challenge lies in addressing unforeseen issues like subfloor irregularities, which can cause tiles to crack or loosen prematurely. Professionals, with their mastery of craft, typically resolve these issues during the initial phases of floor tiles replacement, ensuring longevity and aesthetic appeal. Ultimately, understanding the common challenges and how to overcome them can make all the difference between a fleeting fix and a durable, beautiful finish.
Maintenance and Longevity of New Floor Tiles
Proper Cleaning Techniques
Maintaining the beauty and durability of your newly installed floor tiles is essential to ensure they stand the test of time. Proper cleaning techniques not only preserve the aesthetic appeal but also prolong the lifespan of your floor tiles replacement project. Regularly sweeping or vacuuming can prevent dirt and debris from scratching the surface, especially in high-traffic areas. When mopping, use a gentle, pH-neutral cleaner tailored for tiles to avoid damaging the grout or surface.
In addition, adopting a routine for deep cleaning can help eliminate stubborn stains or residues that accumulate over months. For stubborn marks, a soft brush combined with a mild solution of water and vinegar works wonders without compromising the tile’s integrity. Remember, avoiding harsh chemicals or abrasive tools—common pitfalls that can harm your tiles—is crucial for maintaining their shine and structural integrity.
By following these simple yet effective cleaning techniques, your investment in floor tiles replacement will continue to enhance your space’s charm and functionality for years to come. Regular upkeep is the secret to ensuring your tiles remain a stunning feature rather than a source of concern.
Preventing Damage and Wear
Maintaining the longevity of your new floor tiles replacement is a crucial aspect that often gets overlooked. Proper care not only preserves their visual appeal but also prevents unnecessary damage and wear over time. Investing in a robust maintenance routine can turn your tiled surfaces into timeless features that withstand the rigours of daily life.
One effective strategy is to implement a preventative approach. Regularly inspecting your tiles for cracks or chips allows you to address issues before they escalate. Additionally, using mats in high-traffic zones can significantly reduce the risk of scratching and surface deterioration. For deep cleaning, opt for specialised tile cleaners and avoid harsh chemicals that could weaken grout or surface integrity. Simple measures such as these keep your floor tiles replacement looking pristine for years to come.
- Protective pads on furniture
- Consistent sealing of grout lines
- Immediate cleanup of spills
By adopting these practices, you actively shield your investment from common pitfalls that cause premature wear. Remember, the key to enduring beauty lies in consistent upkeep—your tiles deserve nothing less. This proactive approach ensures your floor tiles replacement remains a stunning focal point rather than a concern in disguise.
Repairing Damaged Tiles
Maintaining the integrity of your newly installed floor tiles replacement is essential to prolong their lifespan and keep your space looking immaculate. Damage, even minor, can quickly turn a pristine surface into a costly repair nightmare. Regular inspection for cracks or chips allows early intervention, preventing small flaws from spiralling into larger issues. When damage occurs, timely repairs are crucial; replacing individual broken tiles can restore the visual harmony without the need for complete reinstallation.
For damaged tiles, follow a methodical repair process to minimise disruption. Carefully remove the broken tile, clean the underlying surface, and ensure the new tile matches perfectly in colour and texture. Applying proper adhesive and grout seals the repair, safeguarding against future deterioration. Remember, a well-executed patch-up not only preserves the aesthetic appeal but also averts the escalation of damage, saving you money in the long run.
- Identify damaged tiles early
- Remove broken or cracked tiles carefully
- Prepare the surface for new tiles
- Apply adhesive and set the replacement tiles securely
- Seal the grout to prevent water infiltration
Keeping your floor tiles replacement in optimal condition requires attention and a proactive approach. By addressing issues immediately and performing routine maintenance, you ensure your tiled surfaces remain striking and durable. This vigilance transforms a potential headache into a showcase of enduring craftsmanship, turning your flooring into a statement of style and resilience.
Cost Factors and Tips for Saving Money
Estimating the Cost of Tile Replacement
Estimating the cost of floor tiles replacement is akin to unraveling a complex puzzle—each piece, from materials to labour, influences the overall picture. Interestingly, the price variation can be staggering; a simple DIY approach might cost as little as a few hundred pounds, while high-end designer tiles or extensive renovations could escalate expenses significantly. One of the primary factors affecting cost is the choice of tiles—porcelain, ceramic, or natural stone—each with distinct price tags and installation requirements.
Labour charges also play a pivotal role, often accounting for up to 60% of the total project cost. To help streamline your budgeting, consider these key elements:
- Type and quality of tiles chosen
- Size and complexity of the area to be tiled
- Preparation work needed on the existing subfloor
- Additional features such as heated flooring or intricate patterns
Smartly navigating these factors can lead to significant savings, especially when considering tips for cost-efficient tile replacement. By understanding what influences the price, you can make informed decisions that balance aesthetics with affordability. Remember, proper planning and a keen eye for detail can turn a seemingly daunting project into a rewarding transformation—without draining your wallet.
Cost-Saving Tips and Tricks
When it comes to floor tiles replacement, understanding the cost factors can mean the difference between a stunning transformation and a wallet-wrenching disaster. The price tag isn’t just about picking the prettiest tiles; it’s a cunning puzzle of material costs, labour charges, and unforeseen quirks of your existing flooring. For example, opting for natural stone tiles might turn your project into a luxury affair, but it also jacks up the budget—think of it as inviting a celebrity chef to cook dinner at your humble abode.
To save some serious pounds, consider these cost-saving tricks. First, choose versatile tiles that can be used in multiple areas—stained glass flooring might be a showstopper, but it’s not budget-friendly. Second, plan your layout meticulously; intricate patterns and customised designs often come with a hefty surcharge. And third, don’t skimp on surface preparation; a smooth, clean subfloor can reduce labour time and prevent future costly repairs.
For those aiming for a budget-friendly floor tiles replacement, a simple ordered list might help:
- Opt for mid-range ceramic tiles—they’re durable and cost-effective.
- Buy in bulk to snag discounts from suppliers.
- Mix and match tiles to create a pattern that disguises imperfections and reduces waste.
Ultimately, a little strategic planning and savvy shopping can turn what seems like an expensive upgrade into an affordable, stylish renewal—without sacrificing quality or style. After all, a well-executed floor tiles replacement isn’t just about aesthetics; it’s about making a smart investment in your home’s future charm and resilience.
When to Invest in High-Quality Tiles
When contemplating floor tiles replacement, understanding the intricate web of cost factors can transform a daunting expense into a rewarding investment. It’s a delicate dance—balancing materials, labour, and the subtle quirks of your existing flooring—much like orchestrating a symphony where each element plays a vital role. The choice of high-quality tiles, for instance, can dramatically influence the longevity and aesthetic appeal of your new floor, making it a wise investment in your home’s future charm.
To truly optimise your budget, consider strategic decisions such as selecting durable mid-range ceramic tiles that offer both style and resilience. Remember, the decision to invest in premium tiles isn’t just about appearance; it’s about durability, resistance to wear and tear, and the peace of mind that your investment will stand the test of time.
- Opt for tiles with a proven high wear resistance
- Prioritise materials with excellent water and stain resistance
- Balance cost with longevity for the most cost-effective results
When the budget allows, splurging on high-quality tiles can elevate your space from ordinary to extraordinary, turning your floor into a statement of elegance that endures.”
Conversely, for those seeking to economise without sacrificing style, clever shopping and meticulous planning can be your allies. Buying in bulk, for example, often unlocks discounts from suppliers, while mixing and matching tiles can cleverly disguise imperfections and reduce waste. However, timing your purchase and choosing the right supplier can significantly impact the overall cost of floor tiles replacement, making savvy shopping a crucial part of the process.
Ultimately, knowing when to invest in high-quality tiles—especially for high-traffic areas or spaces prone to moisture—ensures your floor maintains its allure and resilience over the years. Remember, the true value of floor tiles replacement lies not solely in the initial expenditure but in the enduring beauty and durability it grants your home. With thoughtful selection and strategic planning, your renewed floor can become a timeless masterpiece, a testament to both your style and your wisdom.
Frequently Asked Questions About Floor Tiles Replacement
How Long Does Tile Replacement Take?
The question of how long floor tiles replacement takes can be surprisingly complex, yet understanding the timeline is crucial for planning your renovation. Typically, a straightforward tile replacement in a small room might be completed within one to two days. However, more extensive projects—such as in high-traffic areas or involving intricate patterns—may require several days, sometimes even a week.
Several factors influence the duration of the process, including the size of the space, the condition of the existing subfloor, and whether additional repairs are necessary. For example, if old tiles are stubbornly adhered or the subfloor needs reinforcement, the timeline can extend significantly. It’s essential to factor in drying times after grouting or sealing, which can add to the overall schedule.
In some cases, a detailed plan involves:
- Removing the old tiles
- Prepping the surface thoroughly
- Laying the new tiles with precision
- Allowing proper curing and drying periods
Being aware of these stages helps set realistic expectations for your floor tiles replacement project, ensuring a smooth and efficient transition from old to new flooring.
Can I Replace Tiles Myself?
Many homeowners wonder if they can tackle floor tiles replacement themselves, and the answer isn’t always straightforward. While some minor repairs or small areas might be manageable for those with DIY experience, professional installation ensures longevity and flawless results. Mistakes during removal or laying can lead to uneven surfaces, cracks, or damage that’s costly to fix later.
If you’re considering a DIY approach, it’s helpful to have a clear plan. For example, gathering the right tools—such as a chisel, rubber mallet, tile cutter, and level—is essential. Additionally, understanding the correct techniques for removing old tiles without damaging the subfloor can save a lot of frustration. However, for larger or more complex projects, hiring an expert in floor tiles replacement often proves more efficient and reliable.
- Assess your skill level honestly before beginning.
- Be prepared for potential surprises, like stubborn adhesive or subfloor issues.
- Remember that proper surface preparation is key to a durable finish.
Ultimately, whether you choose to do it yourself or hire a professional, knowing the intricacies of floor tiles replacement can make all the difference in achieving a seamless, lasting transformation.
What Are the Best Tiles for Moisture-Prone Areas?
In areas prone to moisture, selecting the right tiles can feel like a delicate dance with the elements. Bathrooms, kitchens, and laundry rooms demand floor tiles that not only withstand humidity but also resist mould and mildew growth. The best tiles for moisture-prone areas are those that combine durability with water resistance, ensuring longevity and safety. Ceramic and porcelain tiles top the list, thanks to their dense composition and low porosity, which prevent water infiltration.
For added resilience, some homeowners opt for natural stone tiles like slate or granite, but these often require sealing to bolster their moisture resistance. When considering your options, remember that proper installation is essential to prevent water seepage and damage. Choosing the appropriate tiles for moisture-prone areas can make all the difference in maintaining a pristine, durable surface that endures the test of time and humidity.
How Do I Ensure the New Tiles Match My Home Decor?
Ensuring your new floor tiles harmoniously complement your home decor is an art that transforms a simple renovation into a captivating story. When contemplating floor tiles replacement, consider colour palettes, patterns, and textures that echo your interior style—be it contemporary minimalism or vintage charm. A cohesive colour scheme can make your space feel more expansive and inviting, while contrasting textures add depth and intrigue.
For those uncertain about matching tiles to their existing decor, a helpful approach is to create a mood board or consult with a professional. They can guide you through choosing tiles that either blend seamlessly or serve as a striking focal point. Remember, the right selection can elevate your home’s ambiance and reflect your personality in every corner.
When embarking on floor tiles replacement, it’s wise to explore options like:
- Matching the tile colour with your furniture and fixtures
- Choosing patterns that complement your style
- Considering the overall colour scheme of your space
This thoughtful process ensures your new flooring becomes an integral part of your home’s story, making every step a journey through beauty and durability. After all, a well-chosen tile not only endures the test of time but also whispers tales of your unique taste and style in every room.


0 Comments