Preparing for Floor Tiles Installation
Assessing the Space and Design Planning
Embarking on the floor tiles fitting process is an exhilarating journey that transforms ordinary spaces into stunning showcases of craftsmanship. Before the first tile is laid, meticulous preparation of the space is paramount. An accurate assessment of the area ensures that every tile fits seamlessly, creating a flawless surface that stands the test of time. This stage involves measuring the room’s dimensions, noting any irregularities, and considering factors such as doorways, vents, and uneven flooring.
Planning for the installation is equally crucial. Visualising the design and choosing the right type of floor tiles — whether they’re glazed, porcelain, or natural stone — sets the tone for a successful outcome. A well-thought-out plan often includes selecting a pattern or layout that complements the room’s architecture and enhances its natural beauty. To streamline the process, many professionals recommend creating a detailed layout plan, which might involve dry-laying tiles to preview the final look and identify potential challenges before permanent installation begins.
Assessing the space thoroughly and planning ahead ensures a smooth flow through the phases of the floor tiles fitting process, making the entire experience not only efficient but also inspiring. Every decision, from choosing the perfect tile to mapping out the layout, plays a vital role in crafting a surface that is both functional and breathtaking.
Measuring and Calculating Material Requirements
As the anticipation builds for the final reveal, the crucial step of measuring and calculating material requirements can’t be overlooked. Precision during this phase is the difference between a seamless finish and costly errors. The key lies in meticulous measurement—every centimetre counts when estimating the quantity of floor tiles needed. This ensures that no waste occurs and the project remains within budget, all while maintaining the integrity of the design aesthetic.
In the midst of this calculation, consider the layout pattern and the size of individual tiles. For a complex design or large format tiles, it’s wise to account for additional material—typically 10% extra—to accommodate cuts and potential breakages. A detailed inventory of materials not only streamlines procurement but also provides peace of mind, knowing that every tile has been accounted for before the fitting process begins.
- Measure the length and width of each room accurately.
- Calculate the total area by multiplying dimensions.
- Factor in perimeter irregularities, such as nooks or alcoves.
- Determine the number of tiles needed based on the tile size and layout pattern.
This careful approach to measuring and calculating material requirements transforms the floor tiles fitting process from a gamble into a systematic art. When every tile is planned with precision, the installation progresses smoothly, and the final surface emerges as a flawless testament to craftsmanship and foresight.
Choosing the Right Floor Tiles
Choosing the perfect floor tiles is akin to selecting a tailored suit: it must suit the space, complement the décor, and withstand the rigours of daily life. With an array of materials—from the rustic charm of terracotta to the sleek modernity of porcelain—the options can be overwhelming. Yet, the secret to a flawless finish lies in the meticulous selection process that precedes even the first tile being laid.
When considering your options, think beyond mere aesthetics. Durability, slip resistance, and ease of maintenance are vital factors that influence the longevity of your chosen tiles. For high-traffic areas, a robust material with a textured surface might be preferable, while softer tones and delicate patterns lend themselves beautifully to more restrained spaces. To streamline your decision-making, it’s wise to compile a shortlist based on these criteria, ensuring each tile aligns with both your style and practicality demands.
Incorporating these considerations into your selection process ensures that the floor tiles fitting process unfolds seamlessly. After all, the right choice at this stage sets the tone for the entire renovation, transforming a simple space into a statement of taste and craftsmanship. Remember, when it comes to flooring, a well-chosen tile is the foundation of enduring elegance.
Gathering Necessary Tools and Materials
Embarking on the journey of the floor tiles fitting process is akin to preparing for an epic voyage—every tool and material must be meticulously gathered to ensure smooth sailing. The right preparation can transform a daunting task into a seamless experience, turning raw materials into a masterpiece beneath your feet. An organised workspace not only speeds up the installation but also minimises mishaps and costly delays.
To set the stage for success, assemble an array of essential tools and materials. These include a high-quality tile cutter, a notched trowel, spacers, a rubber mallet, and a spirit level. Additionally, you’ll need adhesive suited to your tile choice, grout, and sealing products. For precision, keep a tape measure and chalk line handy to mark out your layout with flawless symmetry. Remember, every element in this list plays a vital role in elevating the floor tiles fitting process from mere labour to craftsmanship.
Careful preparation allows for a more controlled environment, where each tile is laid with care, and every joint is aligned with purpose. When tools are at your fingertips and materials are ready, the magic of transformation truly begins, laying the foundation for a durable, elegant finish that will stand the test of time. The secret lies in the details—each piece fitting perfectly into the grand mosaic of your space’s design story.
Preparing the Subfloor
The foundation of any mesmerising floor begins beneath your feet, where preparation transforms the mundane into the extraordinary. Preparing for the floor tiles fitting process is an art of meticulous attention—each step a brushstroke in creating a durable, stunning space. The secret lies in the unseen: a clean, level, and stable subfloor that acts as the canvas for your tiled masterpiece. Without this crucial groundwork, even the most exquisite tiles can succumb to cracks or shifting over time.
To ensure a flawless installation, it’s vital to assess the subfloor’s condition thoroughly. Look for any signs of movement, unevenness, or moisture issues. If necessary, implement a suitable primer or levelling compound to create a smooth, firm surface. For larger areas, consider the following steps:
- Remove any debris, old adhesives, or loose materials.
- Address underlying issues such as dampness or structural weaknesses.
- Apply a waterproof membrane if the space is prone to moisture.
By laying this solid foundation, the subsequent stages of the floor tiles fitting process can unfold effortlessly, turning your vision into a resilient, enchanting reality. Every detail, from subfloor preparation to precise levelling, influences the harmony of your final result—an enduring symphony beneath your feet.
Surface Preparation for Optimal Tile Adhesion
Cleaning and Levelling the Subfloor
When it comes to the floor tiles fitting process, surface preparation is often underestimated—until you’re staring at a wobbly mosaic of mismatched tiles and a rising tide of frustration. A solid, clean, and level subfloor isn’t just a detail; it’s the backbone of a durable finish. Think of it as laying a foundation for a skyscraper—skip the prep, and everything risks tumbling down.
Start by thoroughly cleaning the surface. Dust, grease, and debris are the silent saboteurs of adhesion, so give the subfloor a vigorous scrub. Next, level out any uneven patches—think of it as smoothing out the wrinkles in a sheet before laying precious fabric. To ensure optimal tile adhesion, use a self-levelling compound if necessary. This step guarantees a flat surface, preventing tiles from cracking or popping up like mischievous toads.
Remember, a meticulously prepared surface isn’t just about aesthetics; it’s about longevity. When the subfloor is properly cleaned and levelled, the entire floor tiles fitting process becomes a seamless dance rather than a chaotic scramble. Whether working with concrete, wood, or existing tiles, prioritising surface preparation turns a good job into a truly professional finish.
Repairing Cracks and Uneven Areas
In the symphony of the floor tiles fitting process, the silent act of repairing cracks and smoothing uneven areas plays a pivotal role, often unseen but endlessly vital. A fractured or irregular subfloor is akin to a jagged terrain—no matter how exquisite the tiles, instability lurks beneath, threatening longevity and aesthetic harmony. To truly master the art of perfect tiling, one must first confront these imperfections with meticulous care.
Cracks and uneven patches aren’t just surface flaws—they are the cracks in the foundation itself. Filling these fissures with appropriate crack repair compounds restores the integrity of the subfloor, transforming chaos into calm. For more stubborn irregularities, a primer of self-levelling compound can create a seamless canvas, ensuring that every tile adheres firmly and stays aligned through time’s relentless march.
In this delicate dance of preparation, consider using unordered list to guide your approach:
- Identify and mark all cracks and uneven patches.
- Apply suitable crack repair fillers, allowing them to cure fully.
- Use a self-levelling compound for high spots or dips, spreading with a trowel for even coverage.
- Allow the surface to dry thoroughly before proceeding to adhesive application.
When cracks are sealed and irregularities levelled, the floor transforms from a treacherous landscape into a pristine stage—ready for the elegant cascade of tiles. This crucial step in the floor tiles fitting process not only enhances visual appeal but also fortifies the structure against future fractures, ensuring your tiled masterpiece endures through seasons and years with unwavering grace.
Checking for Moisture and Stability
In the intricate ballet of the floor tiles fitting process, the foundation must be unwavering, steadfast against the passage of time and the whims of nature. Before the first tile finds its place, a meticulous inspection of moisture levels and structural stability becomes paramount. Hidden dampness beneath the surface can sabotage even the most carefully planned tiling project, leading to future warping or detachment. Therefore, testing for moisture is not merely a step but a safeguard, ensuring the subfloor’s integrity remains unblemished and sound.
Equally vital is the assessment of stability—any slight movement or weakness can cascade into disaster once tiles are laid. To that end, professionals often employ specialized moisture meters and stability tests, revealing unseen vulnerabilities lurking beneath the surface. When these challenges are uncovered, they must be addressed with precision, whether through drying treatments or reinforcement, before embarking on the next stage of the floor tiles fitting process.
In some instances, it’s helpful to remember that:
- Moisture levels should be within acceptable limits for the specific tile type.
- Subfloor stability must be verified to prevent future tiling issues.
- Any anomalies detected require targeted solutions to safeguard the longevity of the installation.
Only when moisture checks affirm dry, stable conditions can the true artistry of tiling commence. This careful preparation amplifies the beauty and durability of your tiled masterpiece, transforming a mere surface into a resilient canvas of craftsmanship. The floor tiles fitting process hinges on these foundational checks, which elevate your project from mere decoration to enduring architecture.
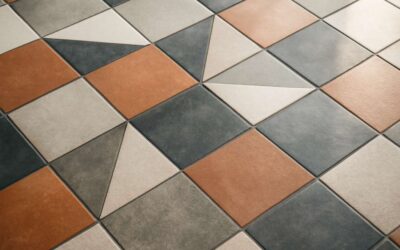
Laying Out and Planning the Tile Pattern
Creating a Layout Plan
Creating a meticulous layout plan for your floor tiles fitting process transforms a mere installation into an act of deliberate artistry. It begins with visualising the space, where the pattern’s rhythm and flow dictate not just aesthetics but the very harmony of the room. The act of laying out tiles before committing to permanent placement reveals subtle intricacies—how the tiles will align, where cuts are necessary, and how the pattern will breathe within the dimensions of the space.
In this stage, a strategic approach involves placing tiles loosely across the surface, stepping back to assess the visual balance. This intuitive process often employs tools like spacers and chalk lines, which serve as guides and safeguards against misalignment. For complex patterns, creating a scaled sketch or using digital layout software can be invaluable, ensuring precision and avoiding costly mistakes.
The key to a seamless finish lies in an unwavering commitment to planning—each tile’s position carefully considered, a silent dialogue between material and space, culminating in a flawless floor that exemplifies craftsmanship.
Dry Laying Tiles for Pattern Alignment
When it comes to the floor tiles fitting process, dry laying the tiles isn’t just a tedious step — it’s the secret sauce that ensures your pattern aligns perfectly and your floor doesn’t end up resembling a jigsaw puzzle gone wrong. Think of it as a dress rehearsal for your installation, where the true visual harmony is revealed before any glue is applied. This stage allows you to spot potential mishaps, like uneven cuts or misaligned patterns, long before they become a costly mistake.
To make the most of this critical phase, some pros prefer a methodical approach: placing tiles loosely across the surface to assess how the design flows. This isn’t just about aesthetics; it’s about balancing visual weight and ensuring symmetry, especially with complex patterns. Using tools such as spacers and chalk lines can help maintain a consistent grid, but for intricate layouts, creating a scaled sketch or digital layout can save hours of headache down the line. Remember, a little extra planning during dry laying can turn a mediocre floor into a masterpiece of craftsmanship.
Whether you’re working with geometric marvels or subtle hues, dry laying provides the clarity needed to perfect your pattern alignment and avoid surprises during the final fitting. After all, a well-planned layout isn’t just attractive — it’s the backbone of a flawless floor tiles fitting process that stands the test of time and traffic.
Marking Cutting Lines and Reference Points
Before the first tile is glued down, laying out and planning the tile pattern is akin to sketching the blueprint of a masterpiece. This crucial step in the floor tiles fitting process involves marking cutting lines and reference points that serve as your guiding stars. Without them, you risk ending up with a mosaic of mismatched edges and a pattern more chaotic than a toddler’s art project.
Begin by visualising the entire layout—think of it as orchestrating a dance where every tile must land in perfect harmony. Use a chalk line or a laser level to establish straight reference lines, ensuring your pattern remains symmetrical and visually appealing. For intricate designs, creating a scaled sketch or digital layout allows for precise planning, saving hours of frustration later.
To facilitate accurate cutting, mark the tiles with a pencil or marker, clearly indicating where each cut must occur. A well-planned layout provides the confidence to execute cuts smoothly and accurately, preventing those dreaded misaligned edges. Remember, in the floor tiles fitting process, meticulous planning of cutting lines and reference points isn’t just optional — it’s the secret ingredient to a flawless finish.
Applying Adhesive and Laying Tiles
Choosing the Appropriate Tile Adhesive
Applying adhesive correctly is the cornerstone of a successful floor tiles fitting process. The choice of tile adhesive can significantly influence the durability and appearance of the finished floor, making it an essential consideration. When selecting an adhesive, consider the type of tiles and the subfloor material—using the appropriate adhesive ensures a strong bond and prevents future issues such as tiles lifting or cracking.
A high-quality, flexible adhesive is often recommended for areas prone to movement or moisture. Spread the adhesive evenly with a notched trowel, creating consistent ridges that help with adhesion. For larger tiles, a thicker layer may be necessary to avoid hollow spots.
- Determine the adhesive’s suitability for your specific tiles and subfloor.
- Mix the adhesive thoroughly, following the manufacturer’s instructions for consistency.
- Apply the adhesive in manageable sections to prevent it from drying out before tiles are laid.
Laying tiles with precision involves pressing each piece firmly into the adhesive, ensuring full contact without sliding. Patience and careful attention during this phase can make the difference between a professional finish and a patchwork of uneven surfaces.
Applying Adhesive and Setting Tiles
Applying adhesive and laying tiles might seem straightforward, but it’s where the true artistry of the floor tiles fitting process reveals itself. Once your subfloor is pristine and level, spreading the adhesive evenly becomes paramount. A notched trowel works wonders here, creating ridges that ensure optimal contact. For larger tiles, don’t shy away from a thicker layer of adhesive—this prevents hollow spots and guarantees a solid bond. Patience is key; press each tile firmly into the adhesive with a gentle twist, ensuring full contact without any sliding or misalignment. Remember, the precision of this step can make or break your professional finish, transforming a simple floor into a masterpiece of craftsmanship. If you’re tackling a sizeable area, consider laying the tiles in manageable sections to prevent the adhesive from drying out prematurely. The careful application of adhesive combined with deliberate tile placement elevates the entire floor tiles fitting process from basic task to an exercise in finesse and technique.
Aligning and Spacing Tiles Properly
Aligning and spacing tiles correctly during the floor tiles fitting process transforms a utilitarian task into an act of silent artistry. Once the adhesive has set, the delicate dance of positioning begins. Every tile must find its place with precision, like pieces of a living mosaic awaiting harmony. To achieve this, use spacers—small, unobtrusive guides that ensure consistent grout lines and a balanced visual rhythm. These tiny tools are the unsung heroes, preventing the dreaded misalignments that can mar the finished floor. As you press each tile into position, gently twist to seat it firmly, watching as the pattern unfolds seamlessly across the surface.
This stage is where patience and keen eye become your allies. For larger tiles, pay extra attention to the joints, maintaining uniform gaps that will later be filled with grout, creating a cohesive and polished appearance. If working on a complex pattern or layout, consider numbering the tiles or creating a grid to keep the design intact. The careful spacing during the floor tiles fitting process not only guarantees visual appeal but also enhances the durability and longevity of the installation.
Cutting Tiles for Edges and Corners
Applying adhesive and laying tiles marks the heart of the floor tiles fitting process, turning an empty surface into a captivating mosaic of craftsmanship. The adhesive, when spread evenly with a notched trowel, acts as the magical binding agent, ensuring each tile adheres firmly to the subfloor. It’s essential to work in manageable sections, preventing the adhesive from drying out before the tiles are set. Carefully press each tile into place, and for larger formats, use a gentle twisting motion to achieve full contact. This ensures a seamless bond and reduces the risk of future cracks or looseness in the finished floor.
Cutting tiles for edges and corners is where precision meets artistry. Using a high-quality tile cutter or wet saw, measure and mark the tiles to fit snugly into the tricky corners and along the edges. For intricate cuts, especially around pipes or uneven margins, a diamond blade provides the finesse needed to achieve smooth, clean edges. Remember, the goal is a flawless, continuous surface — no gaps or misalignments should mar the visual harmony. Whether tramlining the borders or shaping tiles to fit unique spaces, careful cutting is an essential part of the floor tiles fitting process, transforming practicality into visual poetry.
Before Grouting
Checking Tile Placement and Levelness
In the silent moments of the floor tiles fitting process, an unseen tension arises—an anticipation of perfection or inevitable imperfection. Before grouting, it’s vital to meticulously check the tile placement and levelness, for this stage reveals the true character of your craftsmanship. Sometimes, what appears aligned at first glance can mask subtle deviations that will become glaring once the grout sets. A thorough inspection ensures each tile sits flush, creating a seamless surface that endures both time and wear.
Levelness isn’t merely about aesthetics; it’s about integrity. An uneven floor can lead to cracked tiles, uneven wear, and even safety hazards. To verify this, a spirit level or a long straightedge can be employed, but don’t underestimate the value of your own eye—sometimes, the human eye perceives imperfections more acutely than tools. When discrepancies are found, adjustments are necessary, whether by re-levelling the adhesive or repositioning tiles. Remember, the floor tiles fitting process demands patience and precision—these details differentiate a professional finish from a hurried job.
For optimal results, consider this step as an act of moral clarity. Each correction echoes a commitment to quality, ensuring that once grouting begins, the integrity of your work remains uncompromised. Skipping this critical check risks future regrets and costly repairs. When all tiles are verified and perfect, the transition into grouting will be smoother, and the final surface more resilient. After all, a well-executed floor tiles fitting process is a testament to craftsmanship—an enduring expression of dedication to excellence.
Allowing Adhesive to Cure
Once the meticulous task of applying the adhesive and setting each tile is complete, patience becomes the guiding virtue in the floor tiles fitting process. Allowing the adhesive ample time to cure is essential for a durable, long-lasting finish. Rushing this stage risks compromising the integrity of your craftsmanship, leading to uneven surfaces or loose tiles over time. Typically, a curing period of at least 24 hours is recommended, but this can vary depending on the adhesive used and environmental conditions.
During this curing window, the adhesive forms a resilient bond, locking the tiles into place with unwavering strength. Skipping or shortening this crucial phase can cause tiles to shift or lift when pressure is applied—an avoidable flaw that mars the elegance of your work. To ensure optimal results, it’s vital to keep foot traffic and any heavy loads off the newly laid surface until the adhesive has fully set. Remember, patience here is a silent partner in your journey to a flawlessly finished floor, ensuring the entire floor tiles fitting process culminates in a resilient masterpiece.
Grouting and Finishing Touches
Selecting the Right Grout
Once the last tile has found its place and the adhesive has set, the journey into the floor tiles fitting process continues with the delicate art of grouting and the finishing touches. Selecting the right grout is crucial — it’s not merely about colour but about durability and the ability to complement the overall aesthetic. A well-chosen grout enhances the visual harmony, ensuring the tiles become a seamless mosaic of craftsmanship.
The application of grout transforms a tiled surface from simple arrangement to polished masterpiece. It fills the gaps between tiles, locking them into a unified pattern that withstands the test of time. During this stage, attention to detail is paramount; excess grout must be carefully wiped away to reveal clean, precise joints.
For an optimal finish, consider the following:
- Choose a grout colour that either blends into the tiles for a subtle look or contrasts boldly for a striking effect.
- Opt for a grout that is suitable for the specific environment — water-resistant grouts are ideal for bathrooms and kitchens.
- Use a rubber float to work the grout into the joints at a 45-degree angle, ensuring thorough filling and a smooth surface.
Finally, the finishing touches — sealing the grout and cleaning the surface — elevate the whole project from functional to fabulous. These final steps safeguard the integrity of the floor tiles fitting process, preserving their beauty for years to come.
Applying and Smoothing Grout
As the final strokes of the floor tiles fitting process unfold, the true beauty of craftsmanship begins to emerge. Applying and smoothing grout is more than a routine step; it is an act of transforming a mere arrangement into a timeless tableau. When carefully worked into the joints at a 45-degree angle with a rubber float, the grout seamlessly fills every crevice, locking tiles into a harmonious pattern. Excess grout is then gently wiped away, revealing crisp, clean lines that highlight the intricate design and craftsmanship.
Sealing the grout is an essential finishing touch, safeguarding the surface from moisture and staining while enhancing colour vibrancy. A meticulous cleaning thereafter ensures a polished look, elevating the entire floor tiles fitting process from functional to glamorous. This delicate dance of applying, smoothing, and sealing encapsulates the artistry behind every successful tiling project—an enduring testament to quality and precision.
Cleaning Excess Grout
The final act of the floor tiles fitting process is less about routine and more about transforming a utilitarian space into a masterpiece of craftsmanship. Once the grout has been carefully applied and smoothed into every joint, the real magic begins—cleaning excess grout. This step is crucial, as it prevents unsightly grout haze from marring the surface and ensures the clean, crisp lines that showcase the intricate tile pattern. Using a damp sponge or cloth, gently wipe away the residual grout at a 45-degree angle, revealing the true beauty of your handiwork.
Sealing the grout lines adds a layer of protection against moisture and stains, preserving the aesthetic appeal for years to come. It’s a delicate dance—apply, wipe, seal, and then indulge in a meticulous cleaning to elevate the floor from a simple installation to a glamorous display of precision. During this phase, some professionals prefer to use an unassuming yet effective method: a soft-bristled brush to reach into tight joints, ensuring no speck of excess remains. This final flourish not only enhances durability but also turns a functional floor into a showcase of quality craftsmanship, proving that even the smallest details matter in the floor tiles fitting process.
Sealing the Tiles and Grout Lines
The culmination of the floor tiles fitting process is a delicate dance—one that transforms raw materials into a stunning visual narrative. Grouting is more than just a functional step; it’s an act of sealing the story within each joint. Once the grout is applied, the key lies in meticulous cleaning to remove any excess, revealing the precision of your pattern. Using a damp sponge at a 45-degree angle ensures that the lines remain sharp while preventing grout haze from dulling the surface’s inherent vibrancy.
Following this, sealing the grout lines becomes an act of preservation. It’s a protective barrier against moisture, stains, and wear, safeguarding your craftsmanship for years to come. Some professionals prefer to use a soft-bristled brush during this phase, reaching into tight spaces to ensure every crevice is sealed and free of residual grout. This finishing touch elevates the entire floor from a simple installation to a true masterpiece of the floor tiles fitting process, where even the smallest detail bears witness to quality and care.
Post-Installation Care and Maintenance
Curing Time and Final Cleaning
Once the final tile has been positioned and the grout has been applied, the floor tiles fitting process enters a crucial phase of silent patience. During the curing time, which can span from 24 to 72 hours depending on the adhesive used, the integrity of your new floor begins to settle. It’s a delicate period where movement or undue pressure can compromise the alignment or bonding of the tiles, jeopardising the entire craft.
Post-installation care doesn’t end with curing. The final cleaning, performed meticulously, is where the transformation truly emerges. Using a soft cloth and a gentle cleaning solution, remove any residual grout haze and dust, revealing the true beauty of your chosen tiles. This step isn’t merely cosmetic; it preserves the longevity and appearance of your investment.
Remember, patience during curing and attentiveness during cleaning are the silent guardians of a flawless finish. The entire floor tiles fitting process hinges on these subtle acts of care—each decision echoing through the durability and elegance of your space.
Tips for Long-Term Durability
Once your floor tiles fitting process reaches its final stages, the journey toward enduring elegance truly begins. Post-installation care is the silent guardian of your investment, ensuring that the beauty and durability of your tiled surface stand the test of time. Proper maintenance doesn’t require complex tools or secret techniques—just a consistent routine of gentle care that preserves the integrity of the tiles and grout.
To maintain the pristine condition of your floor, it’s essential to perform regular cleaning with non-abrasive solutions. Avoid harsh chemicals that could erode the grout or damage the tile surface. Instead, opt for mild, pH-neutral cleaners that are gentle yet effective. This simple step prevents dirt and grime from settling into the grout lines, which can cause discolouration and deterioration over time.
Long-term durability also hinges on periodic inspections. Look out for any signs of cracking, loose tiles, or grout erosion. Addressing these issues early can prevent more extensive damage, saving both time and money. If necessary, resealing grout lines can provide an extra layer of protection against moisture ingress and staining, especially in high-traffic areas.
- Regularly sweep or vacuum to remove abrasive debris.
- Clean tiles with a soft cloth and mild detergent weekly.
- Re-seal grout lines every 1-2 years to sustain moisture resistance.
Remember, the longevity of your floor tiles fitting process is directly influenced by how attentive you are to ongoing maintenance. A little care goes a long way—preserving the allure and structural integrity of your tiled surface for years to come. Every gentle wipe and timely repair is a quiet act of craftsmanship, ensuring your space remains both stunning and resilient.
Troubleshooting Common Issues
Maintaining the beauty and integrity of your newly fitted floor tiles is essential to maximise your investment. Post-installation care isn’t complicated, but it’s crucial for long-term durability. Regular cleaning with mild, pH-neutral solutions helps prevent dirt and grime from settling into grout lines, which could lead to discolouration and deterioration over time. An overlooked aspect of the floor tiles fitting process is that consistent maintenance is the silent guardian of your tiled surface’s resilience.
Sometimes, despite thorough preparation, issues can arise. Common problems include loose tiles, cracked grout, or discolouration—often caused by moisture ingress or improper sealing. Regular inspections can catch these issues early. If you notice any loose tiles or cracks, addressing them promptly with professional repairs or resealing can prevent more extensive damage. Sealing grout lines every 1-2 years creates a moisture barrier, helping to preserve the tiles’ appearance and structural integrity.
- Sweep or vacuum regularly to remove abrasive debris that can scratch or damage the surface.
- Use a soft cloth with a mild detergent weekly to keep tiles looking their best.
- Re-seal grout lines periodically to maintain moisture resistance and prevent staining.
By staying vigilant and committed to ongoing maintenance, your floor tiles will endure and continue to enhance your space with minimal fuss. Remember, the durability of your floor tiles fitting process depends as much on this routine as it does on the initial installation. Every gentle wipe and timely repair acts as an act of craftsmanship, extending the lifespan of your tiled surface and preserving its aesthetic appeal for years to come.


0 Comments