Understanding Floor Tiling Layouts
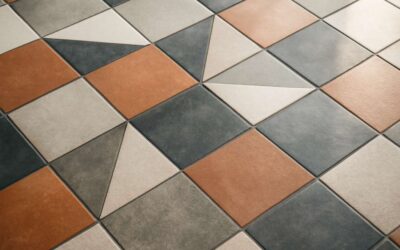
Types of Floor Tile Patterns – Array
Understanding floor tiling layouts is more than mere geometry; it’s a reflection of intention and aesthetic philosophy. Each pattern whispers a story—whether of symmetry, chaos, or harmony—and shapes the very mood of a space. A well-conceived floor tiles plan considers the natural flow of movement, light, and the emotional resonance that different tile arrangements evoke.
Patterns such as herringbone, basketweave, and diagonal layouts exemplify the artistry embedded within floor tiling. They transform utilitarian surfaces into visual statements, revealing the architect’s or homeowner’s deeper desires for order or spontaneity. For a truly captivating design, consider how these patterns interlace with the room’s purpose and the human spirit.
Sometimes, the choice of a floor tiles plan hinges on practicalities—like durability or ease of installation—but other times, it’s an act of rebellion against convention. The interplay of pattern and space invites us to reflect on the nature of structure itself. After all, our surroundings shape us as much as we shape them.
Factors Influencing Tile Placement – Array
Creating an effective floor tiles plan isn’t just about choosing the right pattern; it’s about understanding the nuanced factors that influence tile placement. A well-thought-out layout considers the room’s natural features, such as light sources and traffic flow, ensuring the tiles enhance rather than hinder movement and visual harmony. The goal is to balance practicality with aesthetic appeal, which means considering durability, ease of maintenance, and the overall look.
Several key elements shape a successful floor tiles plan. The size and shape of tiles, for example, can dramatically alter the perception of space. Larger tiles may make a room feel more expansive, while smaller ones add intricate detail. Additionally, the orientation of tiles can create dynamic visual effects, such as running bonds or diagonal layouts, which can either emphasise or minimise room dimensions.
In some cases, the decision on tile placement hinges on structural considerations, like the subfloor’s stability or existing floor plan constraints. For instance, aligning tiles to the natural lines of a room can reduce waste and simplify installation. Sometimes, the layout is dictated by the shape of the space itself, requiring a custom approach to optimise the floor tiles plan and avoid awkward cuts or uneven joints.
Planning Your Floor Tiles Layout
Measuring and Planning Space – Array
In the shadowed chambers of design, the blueprint of your floor tiles plan holds the key to transforming a mere space into a gothic sanctuary. Every measurement whispers secrets of symmetry and chaos, aligning your vision with reality’s stark canvas. Precision in measuring and planning space isn’t just a task — it’s an art form of anticipation, where every inch must be accounted for with meticulous care.
To craft a compelling floor tiles plan, start by sketching the room’s dimensions with unwavering accuracy. Consider the placement of fixtures, doorways, and windows, for they dictate the flow and rhythm of your tile layout. An ordered approach can streamline the chaos, such as:
- Measure the length and width of the entire space.
- Mark the position of fixed elements.
- Calculate the total number of tiles needed, factoring in cuts and wastage.
This strategic process ensures your design embraces both practicality and the dark poetry of visual harmony, turning mundane measurements into a symphony of spatial mastery.
Design Considerations – Array
Crafting a compelling floor tiles plan transforms a mundane space into a realm of visual poetry. Every detail, from the placement of fixtures to the direction of tile flow, holds the power to evoke a sense of grandeur or intimacy. When designing your floor tiles plan, consider the overarching theme—whether it’s a symphony of intricate patterns or a minimalist elegance—that will guide your choices. The layout must harmonise with the architecture, ensuring each tile whispers its part in the overall narrative.
Visualising your design through careful consideration of pattern and proportion is essential. For instance, selecting a central focal point or creating a sense of movement can dramatically influence the atmosphere. To achieve this, you might decide on:
- The orientation of tiles to accentuate room dimensions
- Transitions between different patterns or colours
- The placement of border tiles to frame the space elegantly
Every element in your floor tiles plan should serve a purpose—balancing aesthetic allure with practical harmony—ensuring that your final masterpiece feels both timeless and captivating. The magic lies in the details, where a well-conceived plan elevates the ordinary into the extraordinary.
Tools and Materials Needed – Array
Creating a precise floor tiles plan is the backbone of a successful installation. To bring your vision to life, gathering the right tools and materials is essential—this isn’t a task for improvisation. A well-crafted plan hinges on careful preparation, ensuring every tile aligns perfectly with your design intentions.
For a seamless process, you’ll need a few key items. A high-quality tape measure and a chalk line help mark out your layout with confidence, while a spirit level ensures your tiles will sit evenly—no one wants a lopsided floor! Additionally, consider investing in a tile cutter or wet saw for clean, accurate cuts.
- Measuring tape and chalk line
- Spirit level
- Tile cutter or wet saw
- Adhesive and grout
- Spacers for consistent joints
These tools and materials are the foundation for turning your detailed floor tiles plan into a stunning reality. Every element plays a vital role in achieving a harmonious and durable finish that elevates the entire space, making the effort worthwhile from first cut to final grout line.
Step-by-Step Floor Tiles Layout Process
Preparation of Surface – Array
A flawless floor begins long before the first tile is laid; it starts with meticulous preparation of the surface. Ensuring the substrate is clean, level, and free of debris is the foundation for a durable and visually stunning floor tiles plan. Any imperfections—cracks, uneven patches, or dust—can compromise the integrity of the entire design, transforming a simple installation into a costly mistake.
To prepare effectively, a thorough inspection of the surface is essential. This involves removing old adhesive residues and sealing any cracks or holes. A level surface not only enhances the overall aesthetic but also prevents tiles from cracking or shifting over time. Once the surface is primed and smooth, the installation process can proceed with confidence, knowing the groundwork is solid.
Sometimes, a layer of self-levelling compound is necessary to create a perfectly flat plane. This step, though seemingly minor, is the keystone in executing a seamless floor tiles plan that stands the test of time. When the surface is ready, the excitement of laying out your design becomes a true celebration of craftsmanship and vision.
Laying Out the Pattern – Array
The moment of truth arrives when you start laying out the pattern for your floor tiles plan. This stage transforms your meticulous preparation into tangible progress, revealing the visual harmony you’ve envisioned. It’s a delicate dance of proportions and precision, where each tile’s placement affects the overall aesthetic and durability of the finished floor.
Careful measurement is key. Using chalk lines or laser guides, you can establish a grid that acts as your map. This not only helps maintain symmetry but also ensures that the pattern aligns perfectly across the surface, preventing surprises as the installation progresses. Sometimes, a dry layout—placing tiles without adhesive—can provide a preview of the final effect, allowing adjustments before the actual bonding begins.
To facilitate a smooth workflow, consider these crucial steps:
- Mark the centre point of the room to create a balanced starting position.
- Use spacers to simulate grout lines, giving a clearer picture of the final design.
- Check for visual and geometric alignment, making adjustments as needed.
In this phase, patience becomes your greatest ally. Each measurement, each placement, lays the foundation for a seamless, striking floor tiles plan that will stand the test of time. The thrill of seeing the pattern emerge makes every meticulous step worthwhile, turning a simple space into a true showcase of craftsmanship and vision.
Adhering Tiles – Array
Creating a flawless floor tiles plan is an art that marries precision with vision. As each tile finds its rightful place, the room begins to breathe life, revealing a tapestry of colour and pattern that embodies craftsmanship and elegance. The step-by-step process of adhering tiles—array by array—requires patience and a keen eye for detail. It’s in these moments that the true character of your space emerges, transforming mere materials into a statement of style.
To achieve this, meticulous attention to layout is essential. Using chalk lines or laser guides, you establish a grid that acts as your compass, ensuring that each tile aligns perfectly with the overall design. Sometimes, a dry layout—arranged without adhesive—can serve as a visual preview, allowing for subtle adjustments before the final bond is made. This process helps prevent uneven patterns or misalignments that could mar the finished floor.
By carefully marking the centre point of the room and employing spacers to mimic grout lines, you create a balanced, harmonious pattern. As each tile is laid, checking for geometric consistency and visual symmetry becomes second nature, shaping a space that feels both deliberate and inspired. The journey from planning to installation is a dance of light and shadow, where every measured step promises a breathtaking result.
Cutting Tiles for Edges – Array
Cutting tiles for edges is where artistry meets precision in the floor tiles plan. This step transforms a carefully laid out pattern into a seamless, professional finish. As you approach the perimeter of the room, the need for accurate cuts becomes paramount—no one wants uneven edges or awkward gaps disrupting the visual harmony.
To achieve this, use a quality tile cutter or wet saw, ensuring clean, straight cuts that fit snugly against walls and fixtures. A crucial part of this process is measuring each edge meticulously—don’t rely solely on visual estimation. Instead, mark the tiles with a pencil or marker, taking into account the grout line width to maintain consistency across the entire floor tiles plan.
When working with irregular shapes or awkward angles, a tile nipper can be invaluable. It allows for detailed, incremental cuts that mould the tile to the room’s unique contours. Remember, patience here is key—rushing can lead to costly mistakes or damaged tiles. Carefully fitting each cut piece into position not only completes the floor tiles plan but elevates the overall aesthetic, leaving a polished, refined surface that stands the test of time.
Final Settling and Grouting – Array
As the last echoes of precision echo through the room, the final settling of the floor tiles plan marks a pivotal moment in the transformation from blueprint to masterpiece. This phase demands patience and an unwavering eye for detail, as every tile must align perfectly to sustain the visual harmony crafted through meticulous planning. The process of final settling involves gently pressing each tile into its adhesive bed, ensuring consistent contact and avoiding voids that could compromise longevity.
Once the tiles have settled, attention shifts to grouting — a critical step that seals the entire floor tiles plan with a seamless, durable finish. The grout must be carefully mixed, applied, and smoothed into the joints, filling every crevice while avoiding excess. This not only enhances aesthetic appeal but fortifies the integrity of the surface. Achieving a flawless grout line elevates the overall design, transforming a simple layout into an enduring work of art that withstands the test of time.
Design Tips for a Flawless Floor Tiles Plan
Choosing the Right Tile Size – Array
Choosing the right tile size is the cornerstone of a successful floor tiles plan. Larger tiles can create a sense of spaciousness and seamless flow, making rooms appear more expansive. Conversely, smaller tiles add intricate detail and can be beneficial for uneven surfaces or complex layouts. The key is to consider the size of your space and the visual impact you desire. An overly ambitious tile size in a small room might result in a cluttered appearance, while tiny tiles in a large hall can seem overwhelming.
When selecting tile size, it’s also vital to think about the pattern and overall aesthetic. For instance, rectangular tiles laid in a running bond pattern can elongate a room, while a grid layout with small tiles offers a crisp, modern look. To aid your decision, here’s a quick overview of popular options:
- Large format tiles (600mm+)
- Medium-sized tiles (300mm–600mm)
- Small mosaic tiles (less than 300mm)
Ultimately, your choice should enhance the existing architecture and reflect your personal style—your floor tiles plan is the canvas for your space’s personality and charm!
Selecting Colors and Patterns – Array
Designing a flawless floor tiles plan is as much an art as it is a science. When selecting colours and patterns, it’s essential to consider how they will influence the overall ambiance of your space. Subtle, neutral tones can create an understated elegance, while bold, contrasting colours inject personality and vibrancy. The pattern you choose can dramatically alter the perception of a room, guiding the eye and shaping the flow of movement.
In fact, the right combination of colours and patterns can elevate a simple floor into a captivating visual narrative. For instance, a monochromatic palette with a subtle geometric layout fosters serenity, whereas contrasting tiles in a herringbone pattern evoke energy and sophistication. Remember, your floor tiles plan should reflect your personal style—think of it as the foundation of your interior story. An intentional selection of colours and patterns transforms an ordinary space into something extraordinary, making every step a journey of discovery!
Maximizing Aesthetic Appeal – Array
Crafting a flawless floor tiles plan demands more than just an eye for design; it’s about creating a harmonious balance that elevates your entire space. Maximising aesthetic appeal requires a keen understanding of how subtle nuances—like tile orientation and grout colour—can transform an ordinary room into a visual masterpiece. When envisioning your floor tiles plan, think of it as composing a symphony, where every element plays a crucial role.
One effective design tip is to consider the natural flow of movement within the room. For instance, aligning tiles to guide the eye towards focal points can subtly enhance the perceived space. Incorporating contrasting textures or finishes can add depth, while a carefully curated colour palette grounds the environment in sophistication. Remember, a carefully devised floor tiles plan isn’t just about aesthetics—it’s about creating an experience, a journey with every step you take. Intriguingly, the right arrangement can even influence the mood, making your space feel more inviting or energising—an alchemy of design and intention in perfect harmony.
Common Mistakes and How to Avoid Them
Miscalculations in Tile Quantity – Array
Even the most meticulously crafted floor tiles plan can falter if miscalculations lurk around the corner. It’s a common misconception that simply multiplying the area by the tile size yields an accurate quantity—alas, the devil is in the details. Overlooking waste factors or ignoring patterns can lead to a surplus of unneeded tiles or, worse still, an embarrassing shortage mid-project.
One of the most insidious errors is underestimating the amount of tiles required for intricate cuts and pattern alignments. To avoid this, a savvy approach involves adding an extra 10-15% to the initial calculation—a buffer that serves as insurance against breakages and unforeseen mishaps.
Remember: precision in your floor tiles plan is as vital as your choice of tiles themselves. A misjudged calculation may not only delay your project but also inflate costs unnecessarily. Careful measurement and a sensible margin ensure your space remains flawless from start to finish.
Poor Surface Preparation – Array
Poor surface preparation can sabotage even the most detailed floor tiles plan. If the substrate isn’t properly cleaned, levelled, and primed, tiles are prone to cracking, lifting, or unevenness. These issues often surface weeks after installation, causing costly repairs and delays. Skipping this crucial step might seem minor, but it weakens the foundation of your entire project.
In addition, neglecting to check for moisture issues or structural defects can lead to disastrous consequences. Moisture in the substrate, for example, can cause tiles to loosen or develop mould. To prevent this, always conduct a thorough surface assessment before laying your floor tiles plan. Remember, a meticulous approach to surface preparation ensures the longevity and quality of your tiled floor.
Neglecting Layout Dry Runs – Array
One of the most overlooked yet critical steps in implementing a flawless floor tiles plan is neglecting to conduct thorough layout dry runs. Skipping this phase can lead to unforeseen misalignments, awkward cuts, and uneven visual flow that only become apparent after the tiles are adhered. A dry run acts as a rehearsal, allowing you to identify potential issues before laying down the actual tiles, saving both time and resources in the long run.
To truly appreciate the importance of this step, consider the artistry involved in creating a harmonious pattern—each tile placement contributes to the overall aesthetic. During the dry run, meticulously mark the layout on the surface, adjusting as needed to balance symmetry and minimise waste. This process not only ensures a precise fit but also elevates the entire design concept, transforming a mundane task into a craft of precision craftsmanship.
Incorporating a systematic approach like numbered grid lines or chalk outlines can make all the difference. It’s a reminder that even the most sophisticated floor tiles plan can falter without this essential verification, highlighting the delicate balance between planning and execution that underpins successful flooring projects.


0 Comments